Waxes and Butters
How To Make Pillar Candle | DIY Candle Making Techniques
Pillar candles are a must-have for every modern home. With its excellent scent and elegant appearance, it enhances the home decor. Candle making is a pleasant hobby that is also cost-effective, aesthetically pleasing, and environmentally responsible as it uses only organic components.

The all-natural beeswax and fragrance oil used in this recipe gives not just scent but also nerve-calming properties. Additionally, these candles are better for you and your loved ones. This blog will learn how to make pillar candles and DIY candle-making techniques.
How To Make Beeswax Pillar Candle – Homemade DIY
A classy pillar candle can be quite pricey. So we’ve included instructions on how to make pillar candles as well as DIY candle-making techniques so you can make your own at home.
Candle Making Supplies:
- White Beeswax – 500 Grams
- Red Candle Color Dye – 2 Tablespoons
- Royal Rose Fragrance Oil – 2 Tablespoons
- Aluminium Metal Pillar Mold – 6
- Pre Waxed Candle Wick – 12
- Wick Screw – 12
- Wooden Candle Wick Holder- 1
- Mold Sealer Putty – 6
Directions:
Step 1: Cut and Measure The Wax
Beeswax is utilized for this project. To begin, use a utility knife to cut the wax. Then, using the scored piece of wax, suspend it from a table or countertop’s edge.
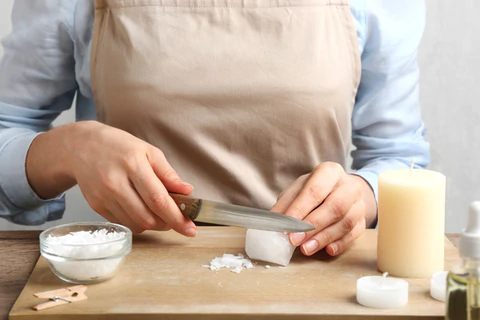
The wax on the score is then broken by applying pressure. You may have to repeat this process a few times to get the wax into small enough bits to fit in the pouring pot.
Step 2: Melt The Wax
A double boiler will be used to heat the wax. To make a double boiler, fill the saucepan halfway with water, submerging the pouring pot in the water. To raise the pouring pot, place an inexpensive metal trivet or cookie-cutter underneath it. This guarantees that the wax is not exposed to direct heat from any direction. Reduce heat to medium-low.
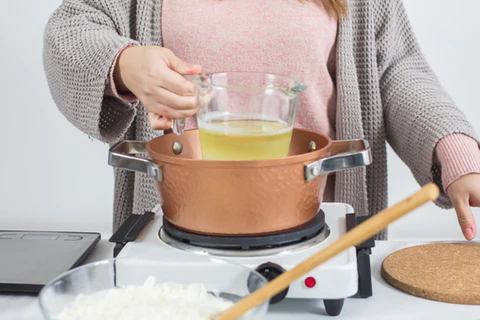
It is necessary to bring the water to a boil, and also, the water may spray out of the pan if it’s at a roaring boil. Take the temperature of the wax from time to time to ensure it does not become too hot. You can proceed with the next stages while the wax melts, but ensure the wax is never left unattended.
Step 3: Prepare The Molds
You can start preparing your molds while the wax is melting. Even if the molds are brand new, the production procedure may have left a tiny layer of oil on them. If you pour the wax into clean molds, your candles will look the finest. To clean them, apply a tiny amount of mold cleaner to a paper towel and thoroughly wipe the insides of the molds. If you don’t have any mold cleaner on hand, a cooking spray will work.

Place the pre waxed candle wick in candle molds or containers. To do so, cut the wick to the desired length. It’s preferable to have too much than not enough, so increase the height of the mold by around 6 inches. As you gain experience building pillars, you may be able to reduce this number. Next, string the wick through the mold’s bottom hole, leaving a few inches of wicking dangling.
Step 4: Anchor The Wick at the Top and Bottom of the Mold
Take the wick and place it flush on the mold’s bottom. After that, roll a piece of putty or sticky glue into a ball and press it firmly into the mold’s bottom. Smooth down the borders of the putty to ensure a good seal and that your mold sits level against your surface.
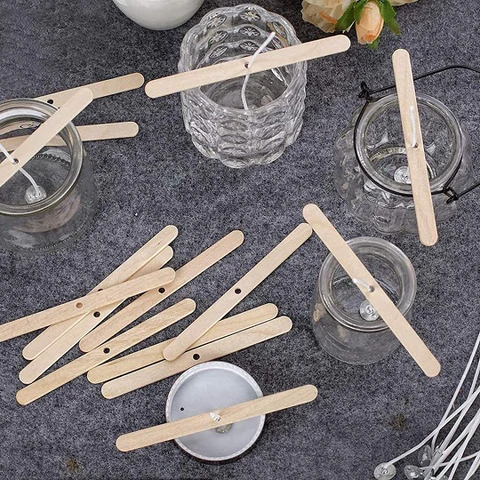
The wax that will leak from the bottom of the mold putty is not used. For the top end of the candle wick, you can use the wooden candle wick holder to maintain its center alignment.
Step 5: Measure and Add Fragrance Oil
You can now add the royal rose fragrance oil once the wax has reached the desired temperature. You might use 2 full tablespoons of scent, depending on the wax you’re using.

The scent is best measured by weight, but if you don’t have a scale that can reliably measure a small amount, you can use a tablespoon. Pour the fragrance into the wax and give it a good stir.
Step 6: Measure & Add Dye

After that, add the candle color dye in the specified amount. If you’re using dye blocks, cutting them into small pieces can help them melt into the wax faster. Stir the mixture until it is well incorporated after adding the necessary amount.
Step 7: Mix All Ingredients Thoroughly
Take the pouring pot out of the double boiler and set it aside. Use a heated pad or something to shield your hand if the grip of the pouring pot heats up somewhat. You may also want to place a few paper towels in the pouring pot to absorb the water from the double boiler. As you prepare your containers, stir the wax mixture occasionally.
Step 8: Pour The Wax Mixture
Check wax temperature once more to ensure it hasn’t dropped too low. It’s best to pour this wax between 85 and 100 degrees Celsius. Pour the wax into the aluminium candle mold slowly. If you pour too quickly, bubbles may appear on the surface of the wax.

The wax should be poured level with the mold’s top. There should be some wax remaining in your pouring pot after filling the mold. This wax will be required for the second pour Pillar Candle.
Step 9: Poke Relief Holes in The Wax
You’ll need to poke relief holes in the candle as the wax hardens. Relief holes are drilled into candles to allow air pockets to escape as the wax cools and contracts. This aids in the preparation of the candle for the second pour.
Make sure to poke them through the candle, but avoid hitting the mold’s side. You risk scarring your candle if you touch the side. As the wax cools, repeat the process several times. The second verse will not be done as long as the wax of the previous payment is completely hardened.
Step 10: Pour The Wax Mixture Again
Reheat the residual wax to about 85°C when you’re ready to make the second pour. Fill in the holes in the candle with the second pour until it is level with the first pour. If you fill past the level of the first pour, the completed candle will be most likely to have a seam line.
Step 11: Remove The Candle From Mold
You can now remove the candle from the mold once the second pour has completely set. To begin, you must first remove the mold putty and screw from the mold’s bottom. After removing the screw and putty, gently pull the mold away from the candle. If you’re having difficulties getting it out, place it in the freezer for about 5 minutes to help the wax come off.
You can use the wick as leverage to help you remove the candle, but don’t pull too hard on it, or it can shatter or come out of the candle. Instead, using wick trimmers, scissors, or nail clippers, cut the wick to a length of 14 inches. Make sure you don’t cut it too short, or it won’t burn correctly.
How To Make Pillar Candles Burn Evenly?
Whether you use homemade or shop pillar candles, how uniformly you burn them will determine how long they last. Size, type of wax, and density of wax all have a role, but there are several things you can do to extend the life of your candles:

- Trim the wick to 1/4 inches before and after each burn, discard any wick trimmings before igniting.
- Allow one hour per diameter inch for the initial burn, then extinguish the flame and allow it to cool fully – for example, if the pillar is three inches in diameter, the first burn should last three hours.
- Keep the top of the wax folded in toward the flame for a longer burn.
- If you’re using a pillar candle in a hurricane holder, make sure there’s at least 1″ between the candle and the hurricane’s interior edge.
- If you take proper care of your pillar candles, they will be more effective, beautiful, and long-lasting.

